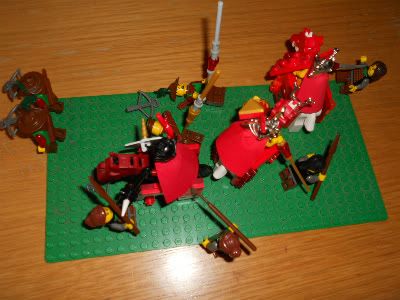
Sir Bragallot wrote:Hello fellow LCC players and welcome to my short battle tutorial 'Lenfald Border Skirmish', in which I will try to explain a system for battle that *could* be used in LCC. Since conflict might arise at one point, I believed a regulated system for war rather than people randomly creating MOCs in which the enemy is always outnumbered and slaughtered would be betterIt is partially inspired by Brikwars, yet, since most of us will not have the time or the materials to wage true Brikwars with one another and representing each other's armies would be a great problem, there's quite big differences as well that should allow even people who live far away from each other to have battles. I've decided to try and keep everything as simple as possible. Now, let's have a look at the battlefield.
Scenario: Princess Lorreaine, tired of the border disputes about who has right to the forest, has gathered a small force at Ferncroft and marched against the Lenfald villagers who live across the border. The villagers were quick to arm themselves and receive some minimal aid. (Note: this is just an example and you're not obliged to view it as 'lore').
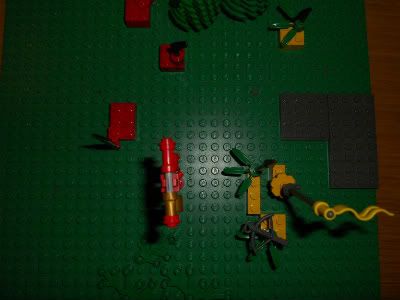
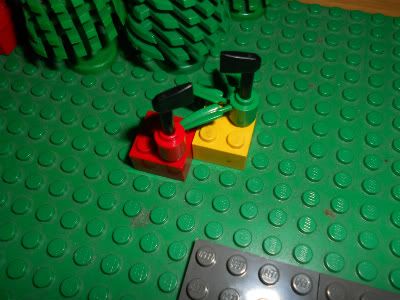
The Basics:
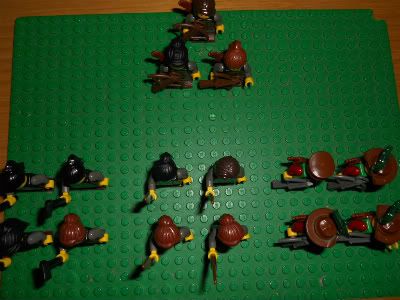
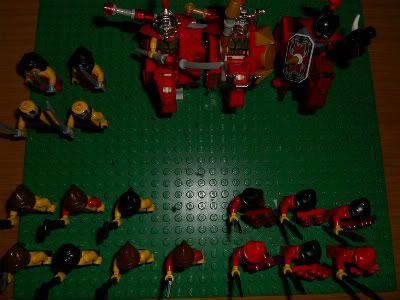
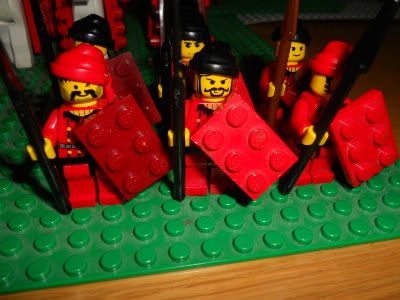
- The Red bricks represent the army of Loreos, the yellow represent Lenfald.
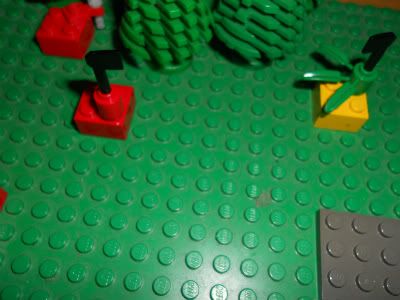
- The size of the brick represents the size of the battalion. One stud = 1 soldier.
- The weapon attached to the brick represents the unit type (more on unit types later). Alternately, if you have enough weapons, you can use pips and more weapons to portray squads. This might actually even look better, although it is a little bit harder to do.
- The banner represents your commander and eventual bodyguards he / she might have. The commander is the most important unit as battles can be decided by capturing / killing the enemy commander.
- Commonly one side will always be the attacking and the defending side. You'll notice in the battle how this affects them.
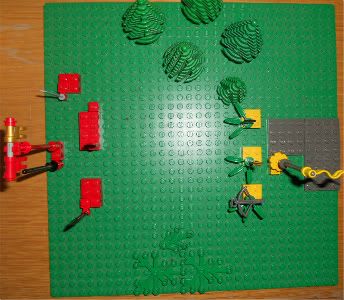
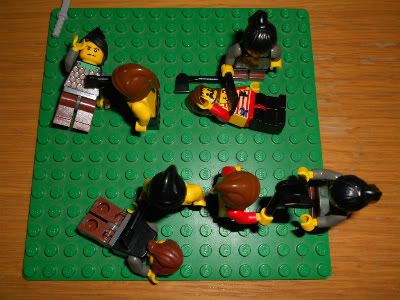
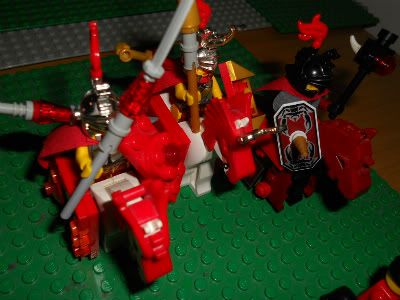
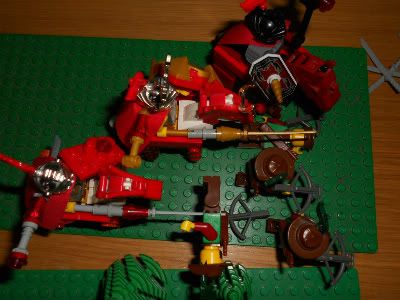
Now, let's have a closer look at both armies.
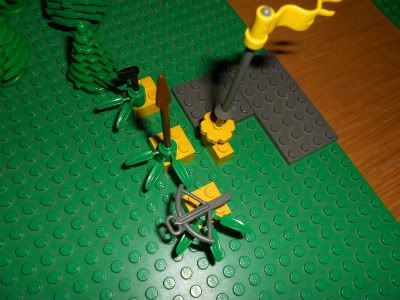
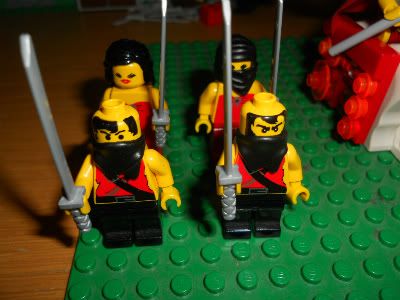
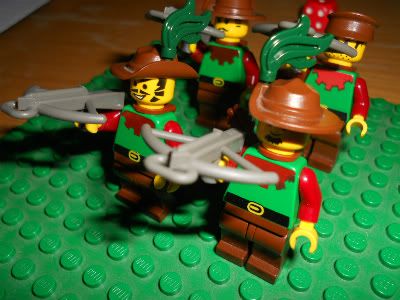
The Lenfald army has a squad of axemen, spearmen and crossbowmen, and their command squad which consists of their Hero Landor and two bodyguards.
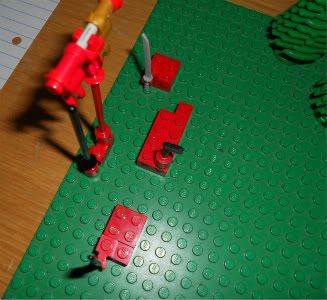
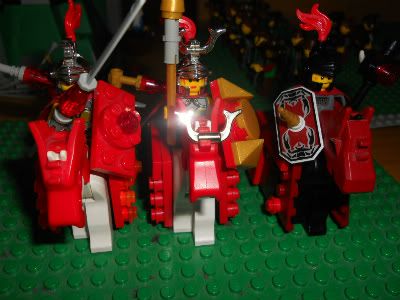
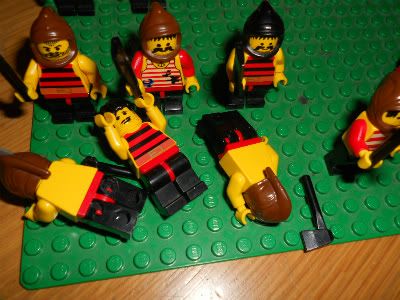
Princess Lorreaine's army has a squad of desert spearmen, axemen and assassins apart from her personal unit of heavy cavalry.
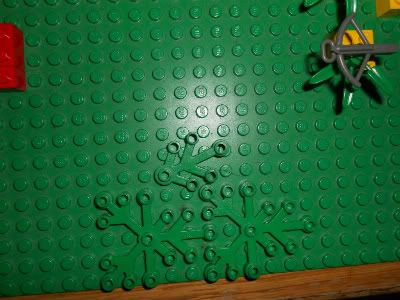
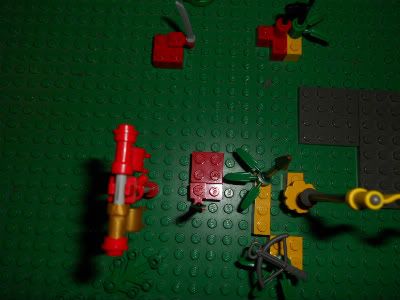
Terrain is important in any battle. When it is decided a battle is going to take place, a neutral player (someone not allied to / at war with either opposing faction) can build the terrain based on the location of the world map the battle is taking place. He will also host the battle.
Forest gives cover from ranged (-1 damage from ranged) and cavalry is less effective in forests (-1 damage from cavalry).
These plants represent a swamp. Cavalry is unable to charge through swamps.
The grey plate behind the Lenfald army is Rough terrain. Rough terrain gives a fighting bonus to light infantry (+1 damage) and a decrease to cavalry (-1 damage).
While terrain is important, the army is of course even more so. Units' abilities are defined by the following stats:
Name (self explanatory)
Unit type: The different unit types are Cavalry, Infantry, Archers and Spearmen. You've already guessed that some unit types will be more effective against others. The following bonuses apply:
Cavalry has +1 attack vs. infantry
Infantry has +1 attack vs. archers
Archers have +1 attack vs. spearmen
Spearmen have +1 attack vs. cavalry
Armour: The minimum roll an opposing unit must make to defeat this unit.
Move: The amount of studs a unit can move in any direction on the strategic map.
Attack: The amount of dice a unit may roll to attack, plus any eventual modifiers.
Range: In case the unit has a ranged attack, this is represented by a certain amount of dots that differs from weapon to weapon or unit to unit.
Formation type: A unit has either a loose or a closed formation. Loose formation units can move through narrow gaps without changing formation, pass through other loose formation units and allow others to pass through them. Closed formation units cannot do any of these things without changing their formation and any allied units will have to move around them. Typically heavier units will have a closed formation.
Ability: A special ability the unit might have, like a formation, special bonus or action.
Formation: Not as much an ability as a state a unit finds itself in, formation has little effect except for the fact that any units that find themselves more than 3 studs away from the nearest enemy cannot attack, meaning a squad that is spread too thin will commonly not be able to use its full power. Changing formation out of battle uses up a unit's action (which it could otherwise use to attack, sprint, or set a response).
Number of soldiers: The unit may use 1 die in combat for every soldier in the squad.
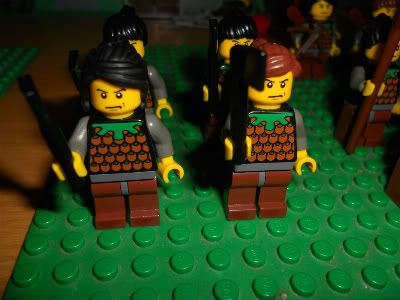
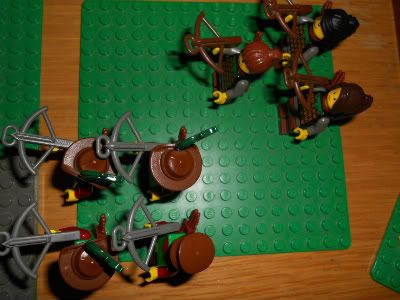
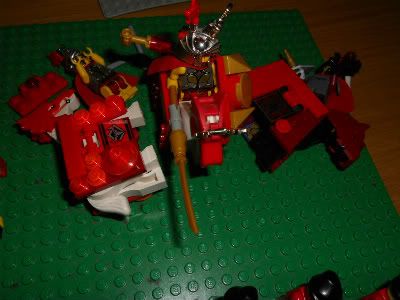
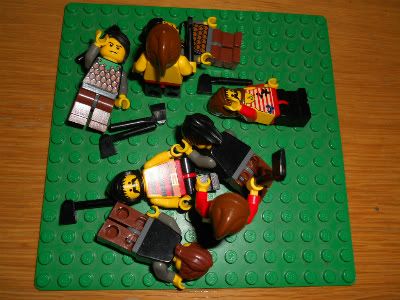
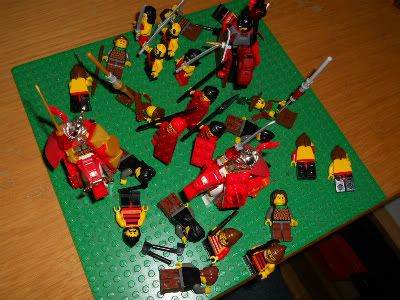
While minifigs in battle are represented by bricks because people's armies can't be expected to face each other physically, it is expected these armies do exist in reality and their existence is supported by pictures. Let's 'zoom in' on both sides.
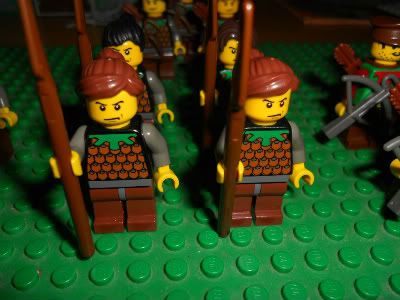
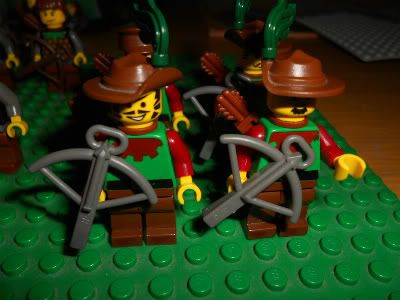
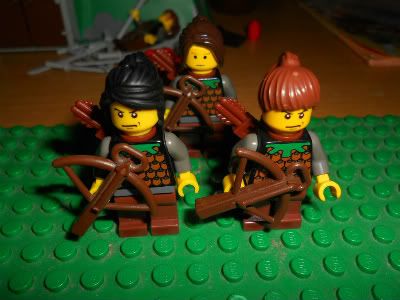
The Lenfald defenders, as lead by Landor the Ranger.
Militia axemen
Unit type: Light infantry (+1 vs. archers), Loose
Armour: 4
Move: 6*
Attack: 1d6
Militia spearmen
Unit type: Spearmen (+1 vs. cavalry), Loose
Armour: 4
Move: 6
Attack: 1d6
Ability: Charge - when moving 5* or more prior to combat, every unit gets 2 attack dice instead of 1. Charges must happen in a straight line.
Rangers
Unit type: Archers, Loose
Armour: 4
Move: 6
Attack: 1d6+1
Range: 10*
Landor's Bodyguard
Unit type: Archers, Loose
Armour: 6+ (this means you need two 6s to kill 1)
Move: 6
Attack: 1d6+1
Range: 10*
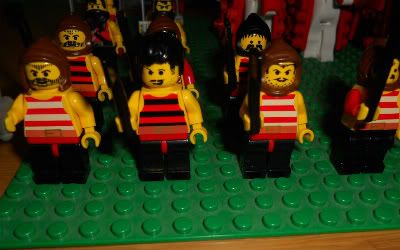
Next we have Princess Lorreaine's Loreesi army.
Zealots
Unit type: Light infantry, Loose
Armour: 4
Move: 6
Attack: 1d6
Desert Spearmen
Unit type: Spearmen, Closed
Armour: 5
Move: 5
Attack: 1d6
Ability: Charge - when moving 5* or more prior to combat, every unit gets 2 attack dice instead of 1. Charges must be made in a straight line.
Assassins
Unit type: Infantry, Loose
Armour: 6
Move: 6
Attack: 1d6+1
Princess Lorreaine's Bodyguard
Unit type: Cavalry, Closed
Armour: 6+
Move: 10
Attack: 1d6+1
Ability: Charge - when moving 5* or more prior to combat, every unit gets 2 attack dice instead of 1. Movement prior to charge must happen in a straight line.
As the battle commences, I will use the opportunity to explain battle mechanics as they occur. Despite being a 'representative' of Loreos and this only being an example, I played both armies to my best ability and actual dicerolls were made, so the outcome was unsure
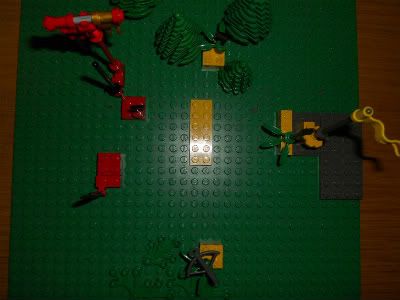
Loreos Turn 1
The Princess starts by advancing her entire force towards the enemy, using the zealots as cannon fodder to prepare her charge, sending the spearmen off to the side and her assassins towards the woods.
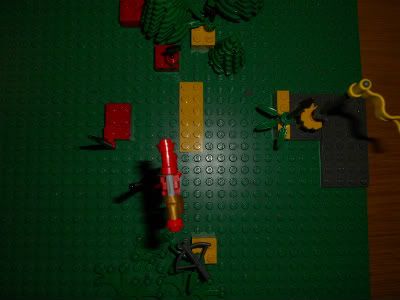
Lenfald Turn 1
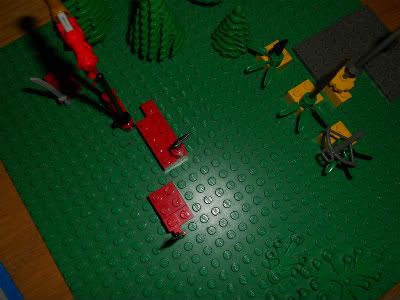
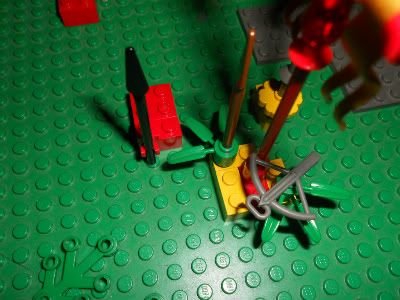
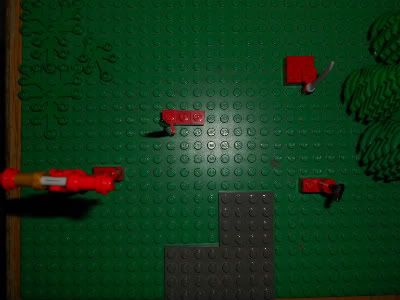
If you want, you can use pictures to illustrate your commands. This helps to make more clear what's going on and gives the impression of a true Lego battle without the units having to effectively face each other, but mainly it's just for fun. This picture shows the Lenfald Rangers opening fire on the advancing Zealots.
Three are cut down.
The spearmen and bodyguard retreat into the rough terrain where the cavalry will be less effective while the rangers and axemen swerve to the sides. The added yellow plate shows Reponse Fire the bodyguard has prepared. Even if it's on the Loreesi's turn, they will automatically fire if any enemy unit passes into range!
Loreos Turn 2
Princess Lorreaine avoids attacking the well-entrenched Lenfalds in the rough terrain and keeps her men out of range while sending her infantry after the enemy axemen and going after the rangers with her cavalry herself.
Lenfald Turn 2
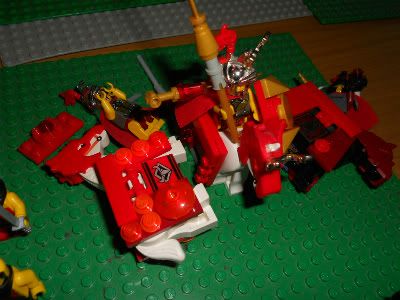
The entrenched group moves to support the rangers as they withdraw, and together they fire a massive volley on Princess Lorreainne's cavalry.
And following some devastating rolls, Lorreainne's two bodyguards are both cut down. At this point I was already thinking about retreating, but then I couldn't show you the rest of the battle mechanics.
The axemen also move further back to avoid being overwhelmed.
Loreos Turn 3
Right, as you can see the enemy axemen are 1 stud out of the zealot's reach.
Yet still, they are able to close in and attack. This is the concept of the Angry Inch which also appears in Brikwars. Attacking units are allowed to move 1 extra stud to get into range to attack. This is to avoid endless kiting of enemy units
Rolls in melee are made simultaneously for both sides. The losses are two to one.
How did the spearmen suddenly get so far? Well, they sprinted. This is another concept that allows a unit to use their action to move 1d6 studs further than it otherwise would be able to. Units who can sprint can also use this ability in addition to their charge.
Next is the Heroic Feat. Your commander may attempt a Heroic Feat, which can be just about anything within his range of abilities and makes a dice roll. Then an opposing roll is made, and if the commander's roll is higher or equal to the opposing roll, whatever he attempted succeeds. If it fails, something bad happens instead. In this case, Princess Lorreainne attempted to command her Bodyguards to get back up again to defend her.
She succeeded with a roll of 4 to 3! The power of feats is decided by the risk the player is willing to take. In the case of this feat, for example, which was quite decisive, a fail would have meant a battalion of Lorreainne's army would have been routed in terror because of the deaths of two of their commanders.
Using her reformed cavalry, the Princess charged and together they slew two rangers. Archers are unable to fight in melee.
Lenfald Turn 3
When a squad engages another squad in combat, they can either fight or attempt to retreat. When retreating, the opposing squad gets a free attack, allowing only the survivors to retreat. The Lenfalds chose to fight, and their squad was destroyed, but they did take another Zealot with them.
The militia spearmen Flanked and Surrounded Lorreaine's cavalry, attempting to end the battle by capturing the enemy standard before things deteriorated further. Apart from their +1 bonus to cavalry, attacking a unit in its flank or from behind also gives a +1 bonus to damage.
Sadly they are ill-equipped to fight Loreos' finest and a massacre ensued, but it was a good attempt and the distraction allowed the rangers to make a Free Retreat (meaning the cavalry didn't get a Free attack when the Rangers withdrew because they were occupied with fighting the spearmen).
Landor and the remaining rangers ran into the rough terrain and fired on the advancing spearmen, killing three. Landor then tried a heroic feat to allow the final spearmen to make a free retreat and join them on the RT, but the feat failed and he was routed off the side of the map instead.
Faced with overwhelming odds, Landor decides to retreat before the Princess' cavalry can run them down. When a faction chooses to retreat, all of the units that are still actively fighting others in a melee surrender and are lost. In this case however, none of Lenfald's remaining units were engaged in combat and they were allowed to retreat safely.
Victory for Loreos!
Please tell me what you think. Any thoughts, questions or criticisms are welcome. I think this system works and I'm all for keeping it simple because I think this could be a fun, easy and quick way to resolve battles (even though there's obviously some things that will expand, like how to show the difference between different units of the same type or height advantages).
Lenfald Border Skirmish
Moderators: Moronstudios, Zupponn, Killer Karetsu
-
Bragallot

- MULTIPLE, SIMULTANEOUS AND DEVASTATING DEFENSIVE DEEP STRIKES!!!
- Posts: 5369
- Joined: Sun Aug 02, 2009 2:00 pm
- Location: Medivo
Lenfald Border Skirmish
This was originally posted on the LCC forum, but I figured it had its place here too.

Last edited by Bragallot on Tue Mar 20, 2012 8:32 am, edited 3 times in total.
-
IVhorseman

- If she don't want the brick, she won't get the dick

- Posts: 5293
- Joined: Tue Dec 11, 2007 10:12 pm
- Location: The Abyss
- Contact:
Re: Lenfald Border Skirmish
You ought to link them something to brikwars proper, maybe some of them are interested?
Warhead wrote:my head burns with War.

Plastik Armory: a bunch of weapons and abilities compatible with the 2010 rules.
-
Bragallot
- MULTIPLE, SIMULTANEOUS AND DEVASTATING DEFENSIVE DEEP STRIKES!!!
- Posts: 5369
- Joined: Sun Aug 02, 2009 2:00 pm
- Location: Medivo
Re: Lenfald Border Skirmish
Yeah, so I did, and it turns out I have to link here anyway.
-
Legofighter

- Officer
- Posts: 172
- Joined: Sat Sep 03, 2011 2:42 pm
- Location: Frozen land of Canada
Re: Lenfald Border Skirmish
(irony) It LOOKS nice, altough I DON"T SEE ANY F* PICTURE (/irony0
Seriously, maybe some new links?
Seriously, maybe some new links?
From the frigid cold of Canada, -40 year long.
-
Bragallot
- MULTIPLE, SIMULTANEOUS AND DEVASTATING DEFENSIVE DEEP STRIKES!!!
- Posts: 5369
- Joined: Sun Aug 02, 2009 2:00 pm
- Location: Medivo
Re: Lenfald Border Skirmish
*badum tish*

-
Bragallot
- MULTIPLE, SIMULTANEOUS AND DEVASTATING DEFENSIVE DEEP STRIKES!!!
- Posts: 5369
- Joined: Sun Aug 02, 2009 2:00 pm
- Location: Medivo
Re: Lenfald Border Skirmish
Not sure. I never arrive too early, but I'm not too sure about the never arriving too late part.
-
Zahru II

- I kinda like it if the lady's dominant...

- Posts: 4462
- Joined: Fri Jul 24, 2009 6:22 am
- Contact:
Re: Lenfald Border Skirmish
Jokes aside, how do you fix bandwith issues? I use photobucket too, I'd better be safe than sorry 
-
Bragallot
- MULTIPLE, SIMULTANEOUS AND DEVASTATING DEFENSIVE DEEP STRIKES!!!
- Posts: 5369
- Joined: Sun Aug 02, 2009 2:00 pm
- Location: Medivo
Re: Lenfald Border Skirmish
I upgraded to pro just to be sure. I think they would've worked again at the end of the month anyway since I would've gotten another 10 Gig though. If it's really the views that push bandwidth over the edge as the image suggests, I guess you could 'protect' your albums by setting them to private?